Wednesday, April 23, 2014

Sports Action Photography Preview

Overview: Sports action photography is a special type of photography that requires the mastery of some basic skills. We will review some of the types of sports photography before we practice these techniques.

Directions: Begin by looking at some great sports photography!!

This GoogleDoc is multiple pages long and it has all the information you need to complete the rest of the work today. So make sure you click the box on the bottom and watch all 20 pages full screen.


Now  go to these websites and see some great sports photos:


or

for  more choices.

Copy and paste photos from the above  sites (DO NOT TAKE PHOTOS FROM THE GOOGLE DOCS PIECE I CREATED) to  complete the 12 slide powerpoint presentation described below:

Make  a PowerPoint with the following slides: Save it as  "LastName_FirstName_sports" in your folder
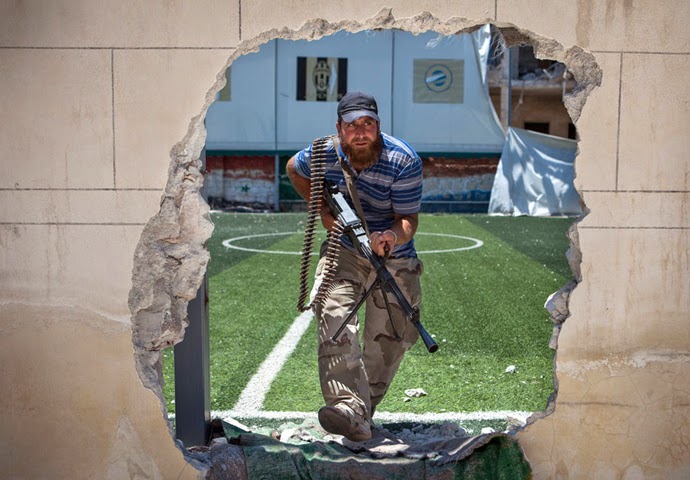
Action
Slide  1 - A Large example of an excellent action shot.
Slide 2- A slide  with a small version of the photo, and the following information:
1)  Is it a money shot or a safety shot? How can you tell?
2) Is it  shot with high (250 or higher), Medium (100-250), or slow (Below 100)  shutter speed, and what specifically in the photo shows this?
3)  Discuss anything about the lighting and / or composition that adds  significantly to the impact of the photo.

Reaction
Slide  3 - A Large example of an excellent reaction shot.
Slide 4- A  slide with a small version of the photo, and the following information:
1)  Is it a money shot or a safety shot? How can you tell?
2) Is it  shot with high (250 or higher), Medium (100-250), or slow (Below 100)  shutter speed, and what specifically in the photo shows this?
3)  Discuss anything about the lighting and / or composition that adds  significantly to the impact of the photo.

Rituals
Slide  5 - A Large example of an excellent rituals shot.
Slide 6 - A  slide with a small version of the photo, and the following information:
1)  Is it a money shot or a safety shot? How can you tell?
2) Is it  shot with high (250 or higher), Medium (100-250), or slow (Below 100)  shutter speed, and what specifically in the photo shows this?
3)  Discuss anything about the lighting and / or composition that adds  significantly to the impact of the photo.

Coach
Slide  7 - A Large example of an excellent coach shot.
Slide 8 - A slide  with a small version of the photo, and the following information:
1)  Is it a money shot or a safety shot? How can you tell?
2) Is it  shot with high (250 or higher), Medium (100-250), or slow (Below 100)  shutter speed, and what specifically in the photo shows this?
3)  Discuss anything about the lighting and / or composition that adds  significantly to the impact of the photo.

Fans
Slide  9 - A Large example of an excellent fans shot.
Slide 10 - A slide  with a small version of the photo, and the following information:
1)  Is it a money shot or a safety shot? How can you tell?
2) Is it  shot with high (250 or higher), Medium (100-250), or slow (Below 100)  shutter speed, and what specifically in the photo shows this?
3)  Discuss anything about the lighting and / or composition that adds  significantly to the impact of the photo.

Features
Slide  11 - A Large example of an excellent features shot.
Slide 12 - A  slide with a small version of the photo, and the following information:
1)  Is it a money shot or a safety shot? How can you tell?
2) Is it  shot with high (250 or higher), Medium (100-250), or slow (Below 100)  shutter speed, and what specifically in the photo shows this?
3)  Discuss anything about the lighting and / or composition that adds  significantly to the impact of the photo.

Monday, April 21, 2014

Caption Writing Test Pre-Writing

Overview: To successfully write captions in the correct format with all of the necessary information, you must first do some pre-writing.

Directions: Closely examine the following photos and complete the following prompts for each of the five photos. Be sure you write the answers for each of these prompts for all FIVE of the photos.

YOU WILL WRITE YOUR PROMTS ON NOTEBOOK PAPER AND TURN IN TO YOUR TEACHER.

Who: The full name (first and last) of all identifiable people in the photo. Sometimes a title like "Captain" or "Officer" or "firefighter" is helpful.

What: The action verb (runs, jumps, shoots, etc.) that describes the action in the photo as if it is happening now for first sentence. Come up with a second action verb for the second sentence (background information sentence).

When: The day of the week, time of day, day of the month if it happened more than a week ago.

Where: The specific location of the event in photo such as city, state, country, neighborhood or street.

Why: The information for second sentence that explains why the person was photographed. Why it is important?

How: An adverb that describes how the action was performed such as "powerfully," "solemnly," or "carefully."


Photo 1


Photo 2


Photo 3


Photo 4


Photo 5


Tuesday, April 8, 2014

Newspaper Completion Checklist and Submission Directions

Directions: It's time to turn in your Newspaper designs. Use the check list below before you are turn in your assignment.

Did you:

1. Build a proper "Flag" at the top of page 1 and 2
2. Fill in the folio with a school name, date, volume and edition on both pages
3. Place all 6 stories into the right place (hint: to get "fill text" put your cursor on the end of the story and right-click -- (Fill with Placeholder Text)
4. Jump the proper story from page 1 to page 2
5. Use fill text in all empty spaces
6. Use 4 of the 6 photos in the proper places. Did you crop in Photoshop? (Remember: I can tell)
7. Use 4 of the 6 captions in proper places
8. Write the 2nd sentence of each caption
9. Write headlines and subheadlines for each story that fill the entire space
10. Write headlines with complete sentences with a subject and verb in "downstyle" (only capital letters at the beginning and proper names) and with no punctuation at the end of the sentence.
11. Fill in the writer and title for every story (with bold for name and italics for title)
12. Fill in the photographers name for each photo
13. Use 1 of the 2 stand-alone photos and place it in the correct place
14. Use the correct caption for the stand-alone photo

I hope you did!!!!

Now send it to me:

Submission Directions:

Part 1. Export your InDesign document as a PDF

Here is a reminder how to do that:

Go to "File" -- Adobe PDF presets -- Smallest File Size

When the pop-up window appears, name the file LASTNAME_FIRSTNAME_NEWSPAPER LAYOUT and hit save (make sure its saved in your folder)

IMPORTANT:  In the middle of the window where it says "PAGES," click the box marked ALL , click export, if you get error messages, click OK.

Part 2. Open Photoshop and find the PDF document in photoshop.

IMPORTANTWhen the IMPORT PDF window pops up, make sure you select both pages by holding down the shift key and selecting the second page. It will open both pages as two separate images that you have to save separately.

YOU WILL NEED TO UPLOAD BOTH IMAGES TO YOUR BLOG.

Go to "File" Save as" and change the FORMAT to .jpeg (file format). make sure to save at maximum size.

Part 3. Open your e-mail and send me the .PDF (DO NOT SEND THE .INDD DOCUMENT)to Mr. Doerr at david.doerr@austinisd.org and Ms. Fleming at lauraflemingphotoj@gmail.com.

Newspaper Design Examples

Check the images below to see a finished Newspaper Design to see how to finish this project correctly.


Please note: You must write a two sentence caption for every photo. The first sentence is provided for you. You must write a second sentence with a past tense verb. The second sentence should provide background information that you can not see in the photo.

Thursday, April 3, 2014

Caption Writing Review

Overview: It's time to review to help prepare you for the big test that shows you know how to write captions and headlines.

We will begin with a Caption Writing Review activity that will ask you to look at a four photos and write a headline and a two-sentence caption for each one.

Assignment: Pick up a Caption Writing headline handout and click the links to see the four photos that you will review use for this activity. The first one we will do together as a class.


Caption 1


Caption 2

Caption 3

Caption 4


Be sure to follow the guidelines below to receive full credit on this assignment for writing full and complete captions.

1. Headline: Headline includes a noun and a verb -- is brief (no longer than 8 words -- is accurate -- uses present-tense active verbs (usually in “s” when singular subject) -- eliminates the word “is” if this is the verb used in sentence and contains no punctuation at the end of sentence. The headline is clever and sparks interest in subject of the photo.

Ex.: Akins wins game after embarrassing mishap on court

2. First Sentence: Uses present tense action verb. Describes what is happening in photo.

Ex.: Johnny Tovar runs down the court on a fast break with the ball to score in the game against Bowie High School.

3. Second Sentence: Past tense verb. Provide background information. Describe something you can’t see in photo.

Ex.: Tovar stole the ball from an opponent who lost his balance after his pants fell down in the middle of the game.

Thursday, March 27, 2014

Intro to Newspaper Design


Overview: We have examined yearbook layout. Now it is time to turn our attention to Newspaper Design. Visit the Newseum's Gallery of newspaper front pages from around the world. Take 15 minutes to look at the different front pages.


Click on the Map View and look at the following:
  • Newspapers from at least three different states in the United States.
  • Two newspapers in New York City. 
  • Two newspapers in Texas.
  • Two newspapers in Europe.
  • Two newspapers in Asia.
Assignment: In a new blog titled "Front Pages of the World" answer the following:
  1. What is the name of your single favorite newspaper front page? Why is it your favorite? 
  2. Post an image of your favorite to your blog.
  3. What city and state is the paper from?
  4. What is your favorite headline from that newspaper? Why are you interested in it? 
  5. How many stories are on the front page of your favorite? 
  6. What do you notice that all newspaper front pages have in common? Look at design, size of photos, size of story text, etc.
  7. What are things that vary (or are different) on the front pages of different newspapers? Look at design, size of photos, size of headlines, etc. 
When you are done  — we will be looking at The Eagle's Eye newspaper and taking some notes about items found in newspapers. Once we are done with that, you will start your next project using the instructions below.

When you are done reviewing the newspapers, find the folder in your student folder titled "Newspaper  Front Page Design Files." Start by opening the PDF titled "Newspaper Front Page Design Directions." You will be designing your own front page using the materials provided in your folder. Follow the directions and create your Front Page in the InDesign file titled "Front and Inside Page."

Tuesday, March 25, 2014

Fast Food Survey

The Eagle's Eye needs help for an upcoming story about students' fast food eating habits. We are looking for students to answer a quick nine question survey about where and why they eat lunch off campus.

Click on the following link to take the survey:

https://www.surveymonkey.com/s/S2Q7P58


Monday, March 24, 2014

The 7 News Values of News

Overview: Recall the seven news values we discussed during class. Find seven stories that you believe are driven primarily by one of each of the news values. Create a new blog entry titled "7 News Values" and provide the information requested below.


Use the following links to help you find articles:

http://www.statesman.com/s/news/local/

To see full access to Statesman articles use the following Login info to their E-edition.

Go to: Austin American-Statesman E-Edition to find your Current Event.

Username: eagleeye
Password: newspass

World News
http://www.nytimes.com/pages/world/index.html

National News
http://www.usatoday.com/news/nation/index
Directions:

Part 1:
  1. Provide the news value that you believe the article matches. (25 points)
  2. Write a complete sentence that explains why the article is driven by the news value you chose. (25 points)
  3. Copy and paste the headline for the article. (25 points)
  4. Copy and paste the link and where you found the article. (25 points)

Below are the news values we discussed in class.
Timeliness  -- the newness of the facts.
Proximity – the nearness of a given event to your place of publication.
Prominence – the “newsworthiness” of an individual, organization or place.
Impact – the effect or consequence of an event on the audience.
Conflict – the meeting of two or more opposing forces. These forces can be physical, emotional or philosophical.
Human Interest – the drama the surrounds people involved in an emotional struggle.
Novelty – the attraction people have to unusual things and events. 

Part 2:

When you finish Part 1, find what you believe are the most important story (most impact) story and the least important story (probably stupidest topic) you can find.

Explain your answer in complete sentences.

Thursday, March 20, 2014

Directions for turning in YOUR yearbook spread

When you finish your self designed spread you must submit your spread the same way you have done before for your magazine cover and your first yearbook spread.

Submitting your PDF by email; posting yourJPEG on your blog

Step 1: When you are done - you need to export a PDF from your InDesign document file (.pdf file extension) and email it to Mr. Doerr at david.doerr@austinisd.org or Ms. Fleming at Laura.Fleming-Holcomb@austinisd.org.

Finally, you must  convert the PDF version of your file into a JPEG (.jpeg file extension) and post it on your blog.

Here is how you do that:

You must have your Yearbook Spread open in InDesign (NOT photoshop)

Step 2: Exporting a PDF from InDesign directions:

  • Go to File --> Adobe PDF presets --> Smallest File Size
  • Rename your yearbook spread as follows: Last name_first name_MySpread_period #
  • Make sure to save it in your folder (not your H-drive, not your S-drive, NOT the desktop, your folder)
  • VERY IMPORTANT: You want both pages of your yearbook spread connected together as a "Spread." So when you see the "Export Adobe PDF" window open, you must click the "Spreads" button underneath the option for "Pages."
  • Click "Export" (if any messages come up about outside the clipping area or anything else like that during the .pdf creation process, click OK)
Step 3: Submission Directions (How to turn it in)
1. Open your email (gmail, yahoo, whatever you use), compose new mail
2. Send your PDF to the appropriate teacher. See addresses above.
3. The subject line is: Last name_first name_MySpread_period#
4. Click attach file (it often has a paperclip looking item next to it)
5. Attach your yearbook spread - BE VERY CAREFUL and make sure to send me the one that is a .PDF (It will have a .pdf ending and the file should look like a little grey square) DO NOT SEND ME THE InDesign document which is purple and at the end says .indd.
6. Click send (or mail or whatever your company uses to send mail.

Posting your JPEG on your blog 
FINALLY  -  we want to post these on your blog. To do this you have to convert the .pdf into a jpeg file.
1. Open Photoshop
2. Open the .pdf of your magazine cover (NOT the .indd, it won't work)
3. When the .pdf converter pop-up box appears, click okay
4. File --> Save as
5. Change the format into .jpeg
6. Click save
7. Make sure you save it at the highest file size
8. If you get any other pop-up boxes, click okay 
9. Post it on your blog.

Wednesday, February 26, 2014

Planning for YOUR yearbook spread

Overview: Now that most of you have finished the yearbook spread we worked on together, getting photos from the internet and sending me a .PDF of your completed work, its time to create your own personal Self-Designed version.

You will be given another size 8 Rough Draft sheet - your job is to create your own unique yearbook spread.

A few things you should know about:

It will be in full color so you are welcome to change both fonts and font colors, as well as the way they are facing.

You will be shooting all of the photos for your spread, so remember that if you decide to put 25 photos on your page. You have to fill all of those spots. Nothing can be "stolen" from the internet. You should be shooting NOW for this assignment. Do not put this off, you need them NEXT class.

RULES:
1 pica gap between every element on your pages
Must have a vertical or horizontal eye-line of some sort
Must have a "dominate" photo
Must have a headline and 1 subhead line
Must have text (story space) which must be at least 2 columns wide and 15 pica (s) tall
Captions should touch the photo they belong too and you must write a caption for every photo on your spread

Things you can alter:
Photo shapes and sizes
Colors
The number of photos
Headline and subhead sizes, shapes, fonts and colors
Size, shape and font of text/story area

Ideas to check out:
Go to PhotoJ drive and find the "PhotoJ Files for Class" folder. Then go to Award Winning examples folder. Open the NSPA folder and begin looking for Yearbook Spreads. So that means folders that begin with YB. I would suggest looking at "Features," "Clubs and Orgs" and "Sports"

Once you find a spread that you like, you can try to recreate it on the blank Yearbook grid paper.

SHOW YOUR SKETCH TO YOUR TEACHER:
YOU MUST show your teacher/sub your spread as you are working. Its on YOU to get up and show your teacher your work. The teacher must sign off on your spread before you begin transferring it to InDesign.

When you are ready to transfer the draft sheet to the computer - open the In Design document called: Yearbook spread #1. Once it is open, save as and change the name to:
Last name_first name_myyearbookspread_period#
Start working.

Getting your completed In Design piece should not take longer than 2 class periods.